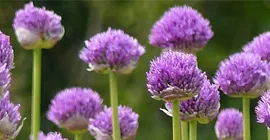
The name Amaryllis comes from the Greek word “Amarysso” which means “To Sparkle” and it certainly does that. The Amaryllis is fast becoming the Christmas plant of choice, meaning the red Christmas Poinsettia could soon be losing its first place crown.
Two types of plants are commonly called Amaryllis. Many of the Christmas favourites, including the bright red variety, and the pink and white flowers all belong to the Hippeastrum genus which is native to South America. The other type of Amaryllis is known as the Belladonna (Amaryllis Belladonna), and there are over 500 known varieties of the plant.
The stunning, velvety trumpet flower of the Amaryllis has made it one of the most popular indoor plants. However this could also be down to the fact that it is one of the easiest bulbs to bloom and is available in a wide choice of colours.
Literally millions of these amazing bulbs are sold every year and each one yields at least one stem of 2-4 flowers per bulb. The larger bulbs can even produce 2-3 stems each. They have a flowering time of between 7 and 10 weeks.
They are best planted in October, November and December, and they can provide a welcome addition of colour to your home during the cold winter months. They can particularly be useful over the festive period by including the plant in your decorations or as a table centrepiece.
Follow our step by step guide for a successful Amaryllis array;
Step 1
Choose large plump bulbs as soon as they are available in autumn and winter.
Plant the bulbs on the day you buy them in a heavy clay pot (this is for balance, as Amaryllis flowers on tall stems can be quite top heavy). Make sure the pot has a hole in the bottom and choose a sturdy saucer (or a spare kitchen saucer if you’re stuck!) to collect any excess water.
Step 2
Add a layer of Westland Potting Grit at the bottom of the pot to help with drainage and cover with a layer of Westland Bulb Planting Compost.
Spread the fleshy roots of the Amaryllis bulb on top of this compost. The neck of the bulb needs to protrude out of the pot by about a third.
Make sure the sides of the bulbs do not touch each other, or the sides of the pot.
Fill in around the bulb with more compost, firming it in gently.
Water thoroughly and allow any excess water to drain off into the saucer.
Step 3
Place your potted Amaryllis bulb in a light receiving area in a draught free room. A windowsill is ideal, but ensure you keep the pot away from radiators as soon as the flower bud starts to appear.
As a rule, the bulbs will flower 6-8 weeks after planting. Normally the flower bud appears before the leaves. To make blooms last longer move the flowering plant to a cooler area.
Keep the compost just moist, not excessively wet. If the conditions are too warm the flower stem may grow taller and weaker and may need staking.
Step 4
10 tips for perfect amaryllis blooms
- Place in a bright spot away from drafts and central heating
- Keep the temperature at around 21C until flowers buds start to open
- Do not let compost dry out, but avoid watering over the bulb – only wet the compost
- Turn the pot every few days to stop the flower stem from bending towards the light
- When the flower buds start to open move the plant to a cooler position to slow it down and extend the flowering period
- If you don’t have a cold room, mist spray the foliage of the plants to raise humidity
- Feed every two weeks with Westland Houseplant food
- Once the flowers fade, remove them from the stem
- Allow the stem to die back naturally, drawing energy back into the
- Keep watering and feeding and you will likely be rewarded with a second flower spike


